Modeller och prototyper – En viktig del av designarbetet
Models and prototypes - An important part of the design work

(Scroll down for English)
Att bygga prototyper och modeller är en viktig del i allt designarbete. Modern produktutveckling är multidisciplinär och beroende av prototyper för att utforska nya idéer och testa dem innan de blir verkliga produkter. Prototyper och modeller hjälper produktdesigners och konstruktörer att förstå problem bättre, utforska mer fantasifulla lösningar, undersöka mänsklig interaktion och testa funktionalitet.
Design och uttryck – Det är värdefullt att tidigt i designarbetet göra enkla skissmodeller utifrån de skisser och formidéer du har. En fysisk modell hjälper dig att förstå och känna storlek, form, kurvor och övergångar. I CAD eller annan 3D-mjukvara är det lätt att testa olika former och visa detaljerna i olika färger och material. Det är fantastiskt bra, men min erfarenhet är att man behöver komplettera CAD-arbetet med tidiga, enkla skissmodeller för att få den fysiska förståelsen och känslan av produkten. Jag upplever att jag kan bara utveckla formen till en viss nivå i CAD, sen behöver jag göra den fysisk och vidareutveckla med händer och sinnen. Skissmodeller gör att designarbetet går framåt fortare och med högre kvalité.
Utvärdering och användartester – Det behövs en mer realistisk modell för att få feedback från användare och beslutsfattare. Vid framtagning av en presentationsmodell av ett designförslaget, faller valet ofta på 3D-printing. Det är relativt enkelt skicka en CAD-modell till en 3D-printer och så har du en fysisk modell i din hand. Enda nackdelen är att finish och ytfinhet år dålig, om du inte lägger mycket tid på efterbearbetning och lackering. Har du kunskap och tillgång till en modellverkstad kan det vara idé att bearbeta fram presentationsmodellen själv. Det finns en mängd olika modellmaterial; skivmaterial, avancerad lera, silikon för gjutning, skummad plast i lika densitet, trä osv.

Design av elverktyg: Min modellprocess
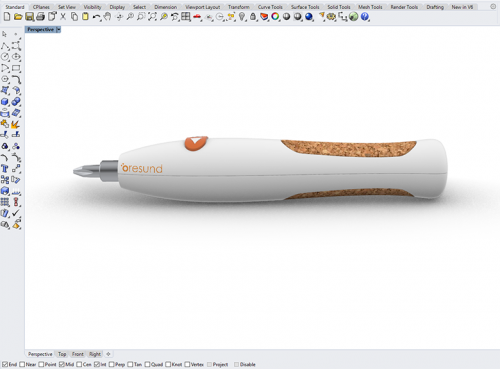
Här är ett exempel på hur jag arbetade med modeller vid design av skruvdragare och slipmaskin.
Skissmodeller
Efter att ha skissat på ett antal grundformer gjorde jag tidigt enkla modeller i papper och kapa för att få en bättre känsla for form och storlek. På så sätt kunde jag snabbt utesluta ett antal varianter.


Sen fortsatte jag att vidareutveckla några utvalda varianter och tog fram modeller i Cibatool. Det är ett modellmaterial av skummad polyuretan med låg densitet, som är lätt att skära och slipa till önskad from. (Cibatool med densitet 80 kg/m3.) Med dessa modeller kunde jag utvärdera grepp, ergonomi, storlek och hur olika ytor relaterade till varandra.

Presentationsmodell
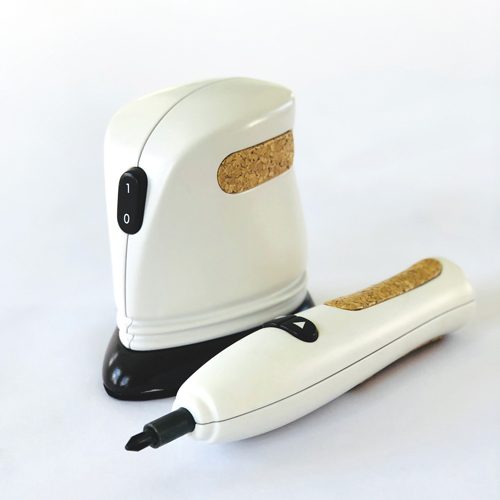
I detta projekt skulle en fysisk modell av slutliga designförslaget presenteras. En sådan modell ska så mycket som möjligt efterlikna den tänka slutdesignen. Därför är det viktigt att den har hög finish och väl arbetade detaljer som ger trovärdighet.
För presentationsmodeller väljer man såklart material utifrån vad det är för produkt man ska bygga. I detta fall använde jag i huvudsak ett polyuretanskum med högre densitet (Cibatool med densitet 800 kg/m3). Det har en densitet ungefär som trä och kräver maskiner för att bearbeta fram former och detaljer. Jag kompletterade med kork samt verkliga delar från andra produkter, i detta fall bits och sandpapper, för att få ett komplett och trovärdig utseende.
Ett bra tips är att bygg upp modellen i delar, likt den färdiga produkten. Då blir det lättare att tillverka delarna och modellen ser realistiskt ut. När alla delar är tillverkade, ska de slipas med fint sandpapper och sprayspacklas. Till slut sprayas de med kulörspray och sedan monteras allt ihop t.ex. med stift, skruv eller lim. Grafik på produkten ökar trovärdigheten. Rita i lämpligt program och beställ gnuggisar att sätta på.


Länktips
- Modellmaterial: ABIC Kemi >
- Gnuggisar: Wassfelt >
- Bok om modellteknik: Prototyping and Modelmaking for Product Design av Bjarki Hallgrimsson >
Lycka till med dina modeller!
ENGLISH
Building prototypes and models is an important part of all design work. Modern product development is multidisciplinary and dependent on prototypes to explore new ideas and test them before they become real products. Prototypes and models help product designers and engineers to understand problems better, explore more imaginative solutions, explore human interaction and test functionality.
Design and expression – It is valuable to make simple sketch models early in the design work based on the sketches and form ideas you have. A physical model helps you understand and feel the size, shape, curves and transitions. In CAD or other 3D software, it is easy to test different shapes and show the details in different colors and materials. It is amazingly good, but my experience is that you need to complement the CAD work with early, simple sketch models to get the physical understanding and feeling of the product. I feel that I can only develop the form to a certain level in CAD, then I need to do it physically and further develop with hands and mind. Sketch models make the design work progresses faster and with higher quality.
Evaluation and user tests – A more realistic model is needed to get feedback from users and decision makers. When producing a presentation model of a design proposal, the choice often falls on 3D printing. It is relatively easy to send a CAD model to a 3D printer and then you have a physical model in your hand. The only downside is that the finish and surface roughness are poor, unless you spend a lot of time on finishing and painting. If you have knowledge and access to a model workshop, it may be an idea to work out the presentation model yourself. There are a variety of model materials; plate materials, advanced clay, silicone for casting, foamed plastic in different density, wood and so on.

Design of power tools: My model process
Here is an example of how I worked with models during design of screw driver and sanding machine.
Sketch models
After sketching on a number of basic shapes, I made early models in paper and kapa to get a better feeling for shape and size. In this way, I could quickly exclude a number of variants.


Then I continued to develop chosen variants and made models in Cibatool. It is a model material of low density foamed polyurethane, which is easy to cut and grind to desired shape. (Cibatool with density 80 kg/m3.) With these models I was able to evaluate grip, ergonomics, size and how different surfaces related to each other.

Presentation model
In this project, a physical model of the final design proposal should be presented. Such a model should as much as possible mimic the final design. Therefore, it is important that it has high finish and well-worked details that makes it realistic.
Of course, for presentation models, you choose material based on type of product to be built. In this case, I mainly used a higher density polyurethane foam (Cibatool with density 800 kg/m3). It has a density similar to wood and requires machinery to machine shapes and details. I complemented with cork as well as real parts from other products, in this case bits and sandpaper, to get a complete and credible look.
A good tip is to build the model in parts, like the final product. Then it becomes easier to manufacture the parts and the model looks realistic. When all parts are made, they should be sanded with fine sandpaper and sprayed with a filler. Finally, parts are sprayed with color spray and then everything is assembled together eg. with pins, screws or glue. Graphics on the product increases credibility. Draw in the appropriate program and order printed graphics to rub on.


Link tips
- Model material: ABIC Kemi >
- Rub-ons: Wassfelt >
- Book on model technique: Prototyping and Modelmaking for Product Design av Bjarki Hallgrimsson >
Good luck with your modelling!
